Scribing
Contact UsCorrectly scribing your countertop is a very important step. Walls in houses are very seldom straight or are corners square.
Your countertop has a 1/2″ pine scribe stick. This makes scribing easier because pine is easier to sand than a typical particleboard stick found on other brands of laminate countertops.
Due to the number of different situations that can be encountered when scribing countertops, we will just touch on the basics.
Tools needed are; a belt sander, extra sanding belts, saw horses, pencil compass, and tape measure.
How to scribe a laminate countertop
- Place countertop on saw horses laminates sides up.
- With a belt sander (Fig.1), 3″ X 21″ size works well, sand pine stick to approximately a 45° point (Fig.2). The idea is to have the backsplash contact the wall with the smallest possible surface touching. Do not sand into laminate yet.
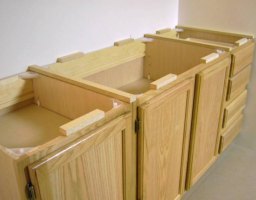
Tip: The best belts to use are cloth, coarse – medium (50-80 grit). They may cost a little more but will last much longer than paper of the same grit. - Place some loose build-up sticks on the cabinet. This will raise the countertop to its installed height.
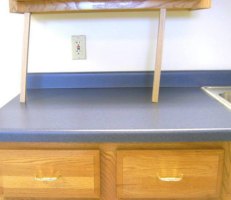
- In this example, we are using kitchen cabinets that are 24″ deep and standard kitchen countertop 25-1/2″ wide. This leaves 1-1/2″ of overhang.
- With the countertop on the cabinet and up against the wall, measure the overhang on the front of the countertop adjusting until you get an equal reading on both ends. Let’s say that measurement is 1-5/8″. Which means the wall is bowed out 1/8″. If you look at the backsplash you will probably see that the backsplash is only touching in one spot and there is a gap between the wall and backsplash everywhere else. The widest gap should be about 1/8″ for this example.
- Set a pencil compass to the widest distance 1/8″ (Fig.3). Now without moving the countertop, set the point of the compass on the wall and the pencil on the backsplash. Run the compass the entire length of the countertop and do ends also if the countertop has end caps. This will transfer all the wall imperfections onto the backsplash and capped ends of the countertop.
Tip: To make the line easier to see, run a 1″ strip of masking tape down the entire top of the backsplash before drawing a pencil line. - Put countertop back on the sawhorses laminate side up. Carefully sand the pine stick and laminate up to the line, maintaining the angle sanded previously. If capped end needs to be sanded (Fig.4) sand at an angle also. Remember to sand so the belt on the sander is cutting towards the pine stick, this will help eliminate chipping on the laminate surface.
- After scribing, put the countertop back on the cabinet again. Now look for any gaps. The countertop should fit much tighter to the wall. If you are satisfied with the result you are done. If not, then the repeat process usually takes off much smaller amounts of material.
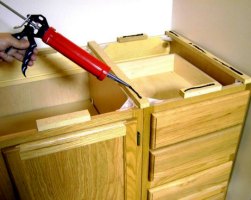
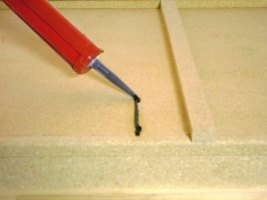
- Caulk is used to filling the small gaps and seal out moisture between the wall and backsplash (Fig.5). Colored caulk is available to match almost all laminate colors.
- Keep in mind that the front overhang will get smaller. You will probably end up with less than 1-1/2″ overhang, this is OK. The goal is to keep the nose of the countertop parallel with the front of the cabinets.
- When scribing there is a point at which you should stop. Sometimes walls can be so bad that there is no scribe left to take off.

