Assemble Miter
Contact UsLaminate Countertop Miter
The miter is a pre-cut angle on the end of a countertop. The two most common angles used are 45° and 22-1/2°. Two 45° angles create a 90° miter corner and two 22-1/2° create a 45° miter corner.
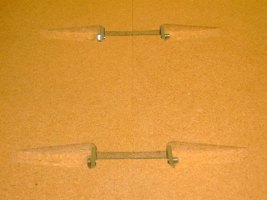
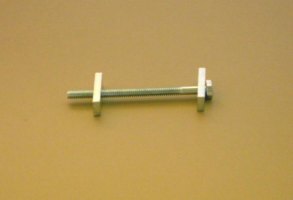
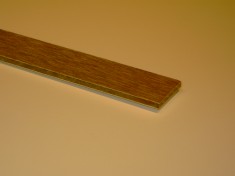
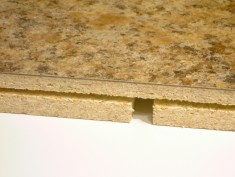
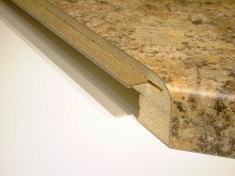
The miter sections also have a mortise (Fig.1) cut into the underside of the countertop to fit miter bolts (Fig.2). Miter bolts fasten the left and right miter sections together. A spline (Fig. 3) can be ordered as an option. The spline is a thick piece of laminate that is to be glued into a slot that is routed into the edge of each miter section (Fig.4). Splines help to level the seam because of the tight fit between the spline and the routed slot.
You should dry-fit the countertops on cabinets. Also check for correct lengths, overhangs, end caps, and overall appearance before proceeding.
Tools needed are; saw horses (min. 3, all the same height), 7/16″ open-end wrench, hammer.
Supplies needed are; miter bolts, spline material (if ordered as an option), small thin piece of wood approx. 1/4″ – 3/4″(T) X 2″(L) X 2″(W), waterproof wood glue, caulk or colored seam fill, cardboard or drop cloth to catch glue squeeze-out that drips to the floor, and a wet rag to wipe excess glue from surface of a miter joint.
How to Assemble Miter
- Place countertop sections to assemble on saw horses laminate side up. Place cardboard or drop cloth under the area of the miter to catch glue that will drip from the miter joint. Dry fit the miter together, making sure the fronts (noses) and backsplashes line up. Also check the alignment of mortises, making sure they are parallel to each other.
- Separate miter and apply a liberal amount of waterproof wood glue to each side of the miter section. If a spline was ordered also apply glue into the routed slot on each miter section and insert the spline into one side of the miter (Fig.5).
- Now you must work quickly. You have about 15-20 minutes to finish.
- Mate surfaces together, line up the noses and put in miter bolt closest to nose and tighten with 7/16″ wrench just enough so it will not fall out.
- Check seam at the backsplash, if not level move sections to level, then put miter bolt in mortise closest to backsplash and tighten enough so it will not fall out.
- Now work your way down the seam install the remaining miter bolts and tighten enough so they will not fall out.
- Using a damp rag wipe glue squeeze-out off the surface of the laminate, taking care not to get water in the glue joint. Water in the glue joint will weaken the glue bond.
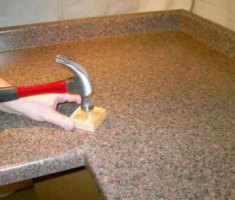
- Starting at the nose, check the level of surfaces. If one side is high place a thin block of wood on the high side and tap with a hammer to level (Fig.6). As the nose becomes level, tighten the miter bolt closest to the nose. Don’t over-tighten, this will prevent the area to align next from moving and can also damage the mortise. If a spline was ordered be careful not to over-tighten the miter bolts, the slot for the spline slightly weakens the mortise cutout. Be careful hammering directly above the mortise, this area is thinner and can be damaged. Work your way to backsplash leveling and tightening as you go.
- When you are satisfied with the levelness of the seam, wipe up any remaining glue from the surface.
- With seam, dry apply caulk or colored seam fill to the joint. Follow manufacturer’s directions for applying and cleaning up.
- The joint must dry COMPLETELY before moving. Follow glue manufacturer’s recommendation for drying time.

